The weakest link in cyber security – the human

As anti-malware software and firewall protections improve, the classic ‘barging in through the front door’ methods that criminals use to breach a network or deliver malware and ransomware, have given way to gaining access to computers and networks through social engineering – that is, fooling the humans. Why waste time trying to knock down the castle gates, when you can trick somebody into giving you the key to the side entrance?

Phishing with emails rather than hooks

The goal of social engineering – phishing, phone and email impersonation, poisoned emails or websites – is to gain access to somebody’s passwords, credentials and/or identity. Armed with that information, the criminal can either directly steal data or money, or the more sophisticated criminal gang can enter the individual’s network through one machine or identity, and then move laterally through the network.

They may lurk around inside the network for weeks or years, observing emails, passwords, relationships with customers and suppliers, management structure, and confidential data. Once they have gained sufficient intelligence, they can go for the bigger scores, such as intercepting or impersonating emails to divert payments for large transactions to themselves, sending requests as if they were senior management, or compromising the customers’ or suppliers’ networks through the trusted relationship those groups have with the breached company.

Only in the end game might they export as much company data as possible, then run ransomware on the company’s machines, and attempt to extort a ransom.

If you have good firewall and anti-malware protection, how do the attackers get in?

Usually because someone has responded in good faith to an email, or a browser popup or webpage, and been duped into entering their account login information. Or has found a ‘lost’ USB stick on the street outside the office, and plugged it into the computer in curiosity to see what is on it. Or has brought their infected personal device into work and attached it to the company network.

As a new angle, with the rise of AI-driven generative text and images, the bar for impersonation, via email, voice or video, has been raised by an order of magnitude. That video call from your CEO requesting an immediate bank transfer? That could be a AI generated bot.

How do you protect yourself from cyber attack?

Education. Individuals need to be trained to think critically, recognize suspicious online behaviour and risk situations, and to practice the responses that will keep everybody safe.

This includes:

  • not reacting immediately or unthinkingly to a perceived urgency
  • never clicking on links in emails or websites without verifying the source and the destination
  • verifying unusual requests independently – with another senior person or by a different form of communication
  • reporting any suspicious activity to the security or technical team.

And in order to do this, a company has to have best practices, plans and policies in place, and a continuing program of education.

Here is a more in depth article on employee training for Cybersecurity

Article on Data breaches in retail operations

Posted in Computer Questions and Answers, Internet and Networking, Security | Tagged , , , , , , , , | Leave a comment

How much RAM Memory can I install in my Windows computer? What does it depend on?

Your computer has a certain number of sockets for memory on its logic board. That will define how many modules can be installed. The machine will also have a maximum RAM module size that can be addressed. In most cases, the # of slots times the max RAM module size = the maximum amount of memory that can be installed. In some cases there may be restrictions that reduce that amount.

Some machines, usually notebooks, have memory soldered on to the motherboard, and are not upgradeable. Others will have some amount soldered on, and single socket for upgrading.

The motherboard memory controller and BIOS can limit the amount of RAM that can be installed. Typically, the memory controller can support individual memory modules up to a certain size only. If the hardware memory controller only supports 2 GB DIMMs, you cannot install 4 GB or 8 GB DIMMs. This comes down to the memory controller’s capability to recognize the number of memory chips and density on the module, at some point the controller cannot ‘count’ any higher. On rare occasions on older machines, a BIOS update allows a memory controller to utilize more memory.

Sometimes, the limits are based on the speed of the RAM modules – some motherboards support one amount of memory at one speed, but a lesser amount of memory if you choose to install higher speed modules.

With server and workstation machines, it becomes more complicated. One motherboard may have a limit of, for example 48 GB for Unbuffered RAM modules, but a limit of 128 GB for ECC Registered RAM modules. Note that you can never mix different types of ECC RAM at once – ECC Unbuffered, ECC Registered and ECC Load Reduced memory are mutually exclusive.

The limits on the amount of memory addressable may also depend on the CPU installed. Some motherboards can address more memory with a Xeon CPU than with a Core i-series.

Dual CPU servers and workstations typically can address twice the number of memory sockets that single CPU machines can. In the case of Dual CPU motherboards where only one CPU is installed, even though there may be 12 or more memory sockets on the board, the sockets addressed by the second CPU will be unusable. Consult with your machine’s documentation for memory population rules for servers and workstations.

There may also be limits on the number of Ranks of memory supported. Each memory module is organized into 1, 2 or 4 Ranks of memory per module. If a motherboard has a limit of 8 Ranks total it can address, you could put in 4 sticks of Dual rank memory, but only 2 sticks of Quad-ranked memory, regardless of what the other limits may be.

The operating system can also be a limitation to the amount of RAM that can be addressed. Any 32-bit operating system will be limited to 4 GB or less of memory.

Windows 7 Starter edition is limited to 2 GB total RAM,


Among 64 GB operating systems,

Windows 7 Home Basic is limited to 8 GB,
Windows 7 Home Premium is limited to 16 GB,
Windows 7 Pro is limited to 192 GB,
Windows 8 Home is limited to 128 GB
Windows 8 Pro and Enterprise are limited to 512 GB
Windows 10 Home is limited to 128 GB
Windows 10 Pro is limited to 2 TB (2000 GB)
Windows 10 Enterprise and server editions can address many TB of RAM
@Memory Limits for Windows and Windows Server Releases

The bottom line is: You need to check the specifications of your particular motherboard, OS and CPU to know what the maximum RAM is for a given machine and what type(s) of RAM it will be able to use. Contact CanadaRAM for help in identifying the best RAM for your use.

Posted in Computer Questions and Answers, Memory, Q&A, Upgrading, Windows questions | Leave a comment

Q. Some manufacturers sell Pro, Business, or Enterprise lines of SSDs. Are they worth it?

Q. Why should I invest more money in a Pro, Business or Enterprise line of Solid State Drives instead of the cheaper consumer SSD’s?

A. In order to answer the question, we need to dive into how SSD drives are built, and how performance and reliability are measured.

TL:DR Professional and Enterprise level SSD drives are more reliable and have better sustained performance than consumer drives. Whether the price difference is worth it to you depends on how you use your computer. SSDs have different performance degradation and failure modes compared to hard drives.

All SSD drives are made with NAND Flash memory chips, but the parts they are built from and their design have a major impact on the performance of the drive and its long term reliability, and the final performance in your machine is limited by the interface.

Reliability:

All drives, SSD drives included, will fail in time. An SSD with a longer expected lifespan is said to have higher endurance. The main point of failure is degeneration of the NAND flash cells, which are worn out a bit every time the cell is written to. As cells die, the SSD controller attempts to work around them with spare cells, but at some point it is unrecoverable and the drive dies.

NOTE: This is why you should turn off automatic and scheduled De-fragmenting, “Optimization” or “Cleanup” for SSDs in your operating system. These needlessly subject the drive to many writes, and reduces its lifespan. Your SSD’s controller has built in TRIM and Garbage Collection routines, let it take care of itself.

How strong are the chips?: One determinant of the reliability of a drive is what NAND flash chips it is made from.

  • Single Level Cell SLC,
  • 2 Level (2-bit) Multi Level Cell MLC,
  • 3 Level Triple Level Cell TLC (sometimes called 3-bit MLC),
  • 4-Level Quad Level Cell QLC.

Increasing the bit level increases storage by allowing the cell to contain three or four bits of information. But it also involves having to distinguish between 8 to 16 different stored voltage levels in a single cell, rather than just one voltage level for single bit ‘on’ and ‘off’ states. At the same time, manufacturers are making NAND with smaller process sizes, and stacking cells vertically in the chip. There’s a big difference in reliability of NAND chips, because the denser you make the cells and the tighter and higher you stack them on the chip, the faster they wear out and the harder it is to keep one cell’s information from leaking into the surrounding cells or gradually losing their internal charge and corrupting data with the wrong voltage readings. Understanding TLC NAND

Increasing density is bad for charge leakage. Here’s an analogy: you are a rock and roll drummer, and you have a mansion on 100 acres of property (you are Roger Taylor). You can rock out as loud as you like, and nobody will complain – or even know. Then you move to a detached house in the ‘burbs, and when you practice, you’re going to get occasional complaints from your neighbor. Next you move into an attached row-house, and you get frequent complaints from the neighbors left and right who can’t escape the racket. And finally you move into a multi-story apartment building, and you get eviction notices from all the neighbors above, below, left, right and across the hall.


Types of NAND and their typical write endurance:

  • SLC – 90,000 to 100,000 writes per cell typical lifespan
  • 2 bit MLC – 10,000 writes per cell typical lifespan
  • 3 bit TLC – 3,000 – 5,000 writes per cell typical lifespan
  • 4 bit QLC – 1,000 writes per cell typical lifespan

That’s pretty dramatic drop in component reliability as the density goes up and the price goes down. But keep in mind that even the lowest quality cells will last years in typical desktop or notebook use (30 – 60 hours per week, if you turn of that nasty Defrag utility, that is). SSD controllers have very robust error correction code and the ability to map spare cells seamlessly to replace failed ones. The endurance differences are more important for servers and storage devices that are under an enterprise or industrial workload 24/7.

How many spares are there?: Second is the amount of NAND flash on the drive that is set aside as spare cells for swapping in as replacements to burnt out cells. This is called Over-provisioning. Higher endurance SSDs will provide more spare cells. Inexpensive drives will have less over-provisioning.

How good is the management?: Third, the quality of the controller on the SSD comes into play, as the controller is in charge of spreading the reads and writes across the available memory cells, cleaning up fragmented memory, reducing overuse of cells while at the same time managing DRAM or SLC caching to maintain high performance. Enterprise drives will have their controllers programmed to optimize for read intensive use, or write intensive, or balanced performance.

How big is the drive?: Finally you need to consider drive size vs. your workload. A larger capacity SSD will always last longer than a smaller one, given the same workload, and will often be faster as well; the reason is the controller can spread the reads and writes across more cells, leveling the wear on cells, and exploiting more parallelism in memory read and write operations. To maximize lifespan, buy a SSD twice as large as you think you need.

DWPD vs TBW vs Warranty

Time for some math. SSD manufacturers use several different (but related) methods to estimate lifespan of the SSD. First there is the warranty that is offered, typically 3 years or 5 years. Then we have two different measures:

Disk Writes Per Day (DWPD) is the manufacturer’s guaranteed number of times that the whole drive can be written to each day of its life, and

TeraBytes Written (TBW) is the total number of Terabytes of data the manufacturer guarantees can be written to the drive over its lifetime.

These two numbers intersect at the warranty date.
DWPD x drive size in GB x 365 days per year x warranty length in years / 1000 will come out the same as the TBW.

So a 500 GB drive with a 0.3 DWPD rating is rated for 150 GB per day of writing. If that drive has a 5 year warranty, the TBW is 0.3 x 500 GB x 365 days x 5 = 273,750 divided by 1000 = 274 TBW.
From this you can also see that a 0.3 DWPD 1 TB drive would have twice the TBW as the 500 GB in the same 5 years. In the SSD world, larger lasts longer, especially if you can limit how full the drive gets, keeping 25% or more of the drive’s capacity as free space.

You can do the math backwards as well to derive DWPD from TBW (TBW / Drive size in TB / 365 / warranty in years), so you can compare drives that use the competing methods. DWPD is easier to work with because it already incorporates the drive capacity into the figure.

What does it Mean? Drive manufacturers may provide Mean Time To Failure MTTF or MTBF ratings. All else being equal, a drive with a higher MTTF would be better. Almost all drives that quote MTTF or MTBF state between 1 million and 2 million hours. But… nobody in this world has ever run SSD drives for 1.5 million hours to see what the actual failure rate is. These are estimated statistical figures with no direct relation to a typical computer user. If you are a data center administrator, feel free to study the figures.

So what is there to choose from? SSD drives come roughly grouped into typical ranges of DWPD ratings:

The type of flash that the manufacturer chooses has a direct relationship to price. High endurance drives with SLC or 2 bit MLC can be up to four times as expensive per TB compared to a consumer TLC or QLC drive.

Will you still be there tomorrow? One overlooked property of SSDs is the persistence of the data when the drive is not being used. Because SSDs store information as electrical charges in their cells (rather than as the magnetic orientation of tiny particles on a platter, as with hard drives) these charges have a habit of leaking away over time. When the charge diminishes, the cell can represent a different (but wrong) value. A SSD needs to be plugged in and turned on periodically to keep the charges refreshed. Therefore SSDs are not a good candidate for cold storage of data – your backup data on a SSD on a shelf may be corrupted when you return to it. The error rate of charge loss increases with the bit density of the cells, so a SLC NAND cell is most reliable, and 4-Level NAND based drives are most at risk of data loss in extended power down state because they have much narrower thresholds between the voltages that represent different data values. Why SSDs die a sudden death

Interfaces: Before we can start to talk about performance, we have to talk about the interface that connects the computer to the SSD. The performance you will get out of the SSD is largely limited by the interface.

  • SATA connected drives are limited to a maximum of 600 MB/s transfer rate by the SATA III 6 Gbps protocol, typical maximum transfer 550 MB/s.
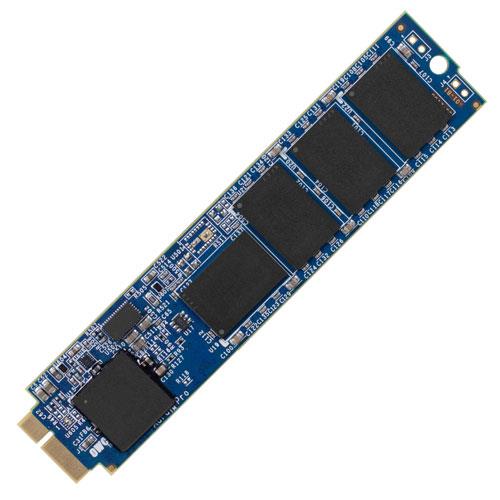
  • SATA SSD drives in a M.2 socket have the same 600 MB/s limitations as SATA drives connected to a SATA port. Early M.2 equipped machines only supported SATA SSDs, later models mostly support PCI-e NVME, and may support SATA interchangeably on one socket as well.
  • SAS (Serial Attached SCSI) is mostly found in servers and enterprise computers, capable of either 600 MB/s or 1200 MB/s. Usually used in the context of RAID arrays of drives that can improve performance and reliability by spreading the data across multiple physical drives.
  • PCI-e Gen 3 NVMe on M.2 socket Capable of up to 3500 MB/sec, depending how many lanes are implemented. 4 lane PCI-e 3.0 (x4) designs are most common, but there are some 2 lane PCI-e 3.0 (x2) economical models with lower bandwidth.
  • PCI-e Gen 4 NVMe on M.2 socket PCI-e 4.0 Capable of up to 5000 MB/sec, Currently only supported on latest model AMD chipset motherboards

The key point here is, that no matter how fast the SSD’s chips are, it cannot deliver data faster than the transfer rate of the interface. If you are looking at attaching the SSD externally, you have the additional limitation of the external interface. Check the footnote below about external interface speeds.

Performance:

NAND performance: As discussed earlier, the differences between SLC, MLC, 3 and 4 level cells affects lifespan, it also affects performance. The more data you pack per cell, the harder it is to read and write it, and the more error correction you have to do; so the longer it takes, which degrades performance. The quality of the NAND chips and the internal design of the SSD also affect performance. As a consumer, you don’t often know the brand or design of the chips in the product, and they may vary within the same drive model, so beyond choosing MLC, TLC or QLC there is little to go on other than taking a deep dive into online review sites.

DRAM or SLC cache design: So when NAND chips get denser, they also get slower to write data. To maintain performance, SSD manufacturers use a caching scheme, where faster memory is used for buffering incoming write requests immediately, and the controller fits these into NAND storage as best as it can between requests. The cache can be RAM Memory (DRAM) which is much faster than NAND (but is volatile so can create issues with losing unwritten cache data if the power is suddenly cut), and/or the cache can be made of SLC NAND or a portion of MLC/TLC NAND that has been programmed to work as SLC (gaining speed at the expense of capacity). Inexpensive SSDs may not have any RAM (DRAM-less) and may have a small amount of NAND allocated to cache.

Falling off a cliff: The catch is that as long as the data you are writing is smaller than the available cache memory, speed will be great. As soon as your write request is larger than the cache can handle, the controller has to slow everything down to the writing speed of the TLC or QLC NAND, and performance drops dramatically. The least expensive SSD drives can be slower to write than a spinning hard drive, once the cache is exceeded (not what you expected from the hype around SSDs!). You can see this when you copy a large number of files from one drive to another. The first 32 GB or so may go by very quickly, and then it will slow down and the rest of the transfer will happen at a relative snail’s pace.

The larger the cache, the less often you will hit the wall of decreased performance in real life. But the larger your file workload, the sooner you will hit the wall. You need to know your workload to make an informed choice.

Note: This is why you have to dig deeper into reviews for SSDs for sustained large-file write performance if you are concerned about performance. Manufacturers will advertise read and write speeds measured with tests that are below the cache limit only, so every SSD looks fast. They almost never advertise the large file write speed.

In general, professional and enterprise SSDs are engineered for consistent performance under heavy workloads. This may mean that the advertised write speeds are actually lower than consumer drives – say 450 MB/s vs. 520 MB/s – but this hides that fact that under heavy loads, the enterprise drive may maintain 400+ MB/s writing while the consumer drive may have dropped to 100 MB/s or less.

Capacity: As mentioned, a larger drive will last longer than a smaller drive. In addition, larger drives usually have larger caches, and the controller can exploit more parallelism between the banks of NAND chips in the drive, which results in faster performance. If you keep more empty space on the drive, that increases the chance of the controller being able to use empty blocks for writing (which is faster than copying, modifying, erasing and writing a block that has data in already). The more free blocks, the less time the drive has to spend on internal maintenance (garbage collection).

Show me the cache: Some modern SSDs also use dynamic emulated SLC caching, where TLC cells are programmed to run in SLC mode – which is much faster. If you have lots of empty space, these drives can allocate more cells to cache, for example 200 GB of cache instead of 24 GB.

Q. Is a faster SSD worth the money?

A. It depends on you. There’s no doubt that more expensive drives can be faster and more reliable. But do you need it? And if you do, what is the extra performance worth?

What are you using the drive for? If your use is fairly light, and you are not working with huge files, media production or databases, then a slower SSD may well be enough for your needs. Keep in mind that the Read performance difference between brands and models is quite small, and the small transfer Write performance is also quite close between models. M.2 PCI-e NVME drives are 3 – 4 times higher bandwidth than SATA drives and are similar in price, so if your hardware gives you the choice, opt for the PCI-e NVME option.

If you are working in a professional environment where each second of waiting time costs money or impedes your productivity, then a faster SSD that sustains speed in large volume writes can be well worth it, as may be an array of SSDs on Thunderbolt or on a PCI-e card if you have high volume work like 4K and higher video editing.

As an opinion, if you are not in the professional / critical use category, then instead of spending top dollar on a pro level drive, get a good quality consumer or business level drive, but spend the extra money to double the capacity above what you were planning.

Q. Pro SSD drives seem more reliable, sure, but they are more expensive. Is the price worth it?

A. The value of the increased reliability comes down to the value of your data and the cost of downtime.

What’s it worth to you? If a SSD fails, it often fails without prior warning. This means that the data you have at risk is all of the data that has been modified since your last backup. You can estimate the cost by looking at the time period between backups, and the cost to recreate the amount of data that would be lost in that period of work (manually re-entering from paper documentation or email trails, and redoing work), plus the cost of losing irretrievable data (for which there is no other record).

Obligatory warning: Whatever drive(s) you use, you must have a robust backup plan for your data, which includes both live backup and off-line archival backup storage. You should also have recovery disks and disk images saved of the boot volume(s) of each of your machines, so you can quickly restore to a base OS and Application configuration.

Down and out: Added to the cost of lost data is the cost of downtime (being out of business on that machine until it is repaired) and the cost of restoration (the labour cost and time to reinstall and restore from backups).

Once you have an estimate of the cost of failure, then you can look at the comparative price of the drives and the estimated difference in lifespan and reliability given your usage.

Price/Performance: As mentioned, the performance difference under light loads isn’t very different between inexpensive drives and professional drives. Almost all SATA SSDs claim Read speeds (best case) over 500 MBps and Write speeds (best case) of 450 – 520 MBps. Because of their much faster interface, PCI-e NVME drives have ranges from 1800 – 2800 MBps; they are so much faster that for casual use, the differences between them are less significant. So for light loads, there isn’t much use in comparing performance.

The money is on the barrel head however when it comes to heavy load performance and endurance. The tricky part is, the correct choice depends on the type of load that you are putting on it. Check websites like https://www.storagereview.com/ for deeper review of drive performance under load.

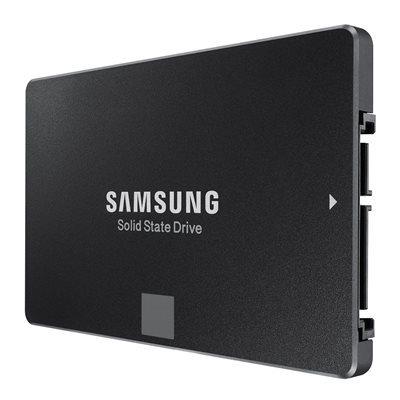
Here is a comparison of pricing and endurance of 1 TB class drives within some brands (Pricing is in CAD and will change, so these are relative measurements only) You can see the spread of pricing can be more than double. The high relative price of the 2-bit MLC Samsung Pro drive illustrates how much cheaper TLC and QLC components are.

Samsung 860 QVO SATA 1TB $190, QLC 3 year warr. 0.33 DWPD
Samsung 860 EVO SATA 1TB $290, TLC 5 year warr. 0.33 DWPD
Samsung 860 PRO SATA 1TB $499, 2-bit MLC 5 year warr. 0.66 DWPD
Samsung 883 DCT SATA 960GB $368, 3-bit MLC (TLC) 5 year warr. 0.8 DWPD

Kingston A400 SATA, 960GB TLC $210, 3 year warr. 0.28 DWPD
Kingston UV500 PCI-e NVMe 960GB TLC $250, 5 year warr 0.27 DWPD
Kingston A2000 PCI-e NVMe 960GB TLC $280, 5 year warr 0.33 DWPD
Kingston KC600 SATA 1024GB TLC $250, 5 year warr 0.33 DWPD
Kingston KC2000 PCI-e NVMe 1TB TLC $370, 5 year warr. 0.33 DWPD
Kingston DC500M SATA 960GB TLC $430, 5 year warr. 1.30 DWPD

Q. What would you do?

A. We recommend identifying which drives (SSD or HD) in your systems are mission critical – that is, the ones that have the highest cost of failure and the highest cost of downtime. Spend your money on better quality drives for those purposes. Buy higher capacity drives if you can budget for it. Then, put those drives on a regular replacement schedule to replace them with new drives BEFORE they fail. This may be a 2 year or 3 year schedule, where you budget for proactive replacement of the drives with new ones. This has the side effect of always making sure you have larger and faster drives with current technology and under warranty.

The used drives that come out of critical-use service on the replacement schedule, can then be re-purposed to less critical uses.

Footnote: External Interfaces: External drives have to go through a USB, Firewire or Thunderbolt port, and therefore the protocol of the interface imposes a limit on performance. Thunderbolt is the only interface that can rival a motherboard-direct connection.

  • Firewire which is no longer used on modern machines, was the fastest option last decade, but Firewire 400 can do 40 MB/s and Firewire 800 tops out at about 80 MBps, these can’t keep up with a SSD or a fast spinning hard drive.
  • USB has several varieties, the main problem with USB is that it has built in latency and processing overhead which limits performance.
  • USB 2.0 is quite slow for drives, theoretically up to 40 MB/s but effectively closer to 25 MB/s effective transfer rate.
  • USB 3.0 SuperSpeed is adequate for drive storage but a bit slow for direct use, 5 Gbps bandwidth delivers up to 300-400 MB/sec.
  • USB 3.1 Gen 1 SuperSpeed 5 Gbps bandwidth delivers 300-400 MB/sec
  • USB 3.1 Gen 2 Superspeed + 10 Gbps bandwidth delivers up to 1250 MB/sec, 700-800 MB/s typical.
  • USB 3.2 Gen 1 SuperSpeed is 5 Gbps bandwidth delivers 300-400 MB/sec
  • USB 3.2 Gen 2 SuperSpeed+ is 10 Gbps bandwidth, up to 1,250 MB/sec, 700-800 MB/s typical.
  • USB 3.2 Gen 2+2 SuperSpeed+ is 20 Gbps bandwidth delivering up to 2,500 MB/sec, 1600 MB/s typical
  • Thunderbolt (1) 10 Gbps bandwidth, up to 1,250 MB/sec, 700-800 MB/s typical
  • Thunderbolt 2 20 Gbps bandwidth delivering up to 2,500 MB/s, 1,750 MB/s typical
  • Thunderbolt 3 40 Gbps bandwidth delivering up to 5,000 MB/s, 2,800-3,500 MB/s typical

Posted in Computer Questions and Answers, Hard Drives and SSD, Q&A | Tagged , , , , , , , , , , , , , | Leave a comment

Have you talked to an elder today? Reach out to others

Have you talked to an elder today? With social distancing, isolation takes its toll. Consider reaching out by phone, daily, to neighbors, shut-ins, singles, elders and any other vulnerable people you know.

Offer your support in whatever way you can, connect with them through your voice, check and see how they are doing, and most of all, listen to them and acknowledge their feelings.

Thank you for making a difference in your community.

Posted in Media and Commentary | Tagged , , , , , , , , , , , , | Leave a comment

What SSD drives and RAM fit Late-2012 and newer Macintoshes?

Starting with the Late 2012 models, Apple changed the format of drives and memory in most Macs. ( Link to pre-2012 model list )

MacBook Pro and MacBook Air models (including all the “Retina” screen models) lost the ability to have the memory upgraded (you are stuck with the RAM that the motherboard was made with). At the same time, Apple discontinued 2.5 inch SATA hard drives in these models and changed to proprietary Apple SSD designs. Many of these models can have the internal SSD upgraded, but the SSD has to be carefully matched to the model and year of Mac.

What does “proprietary” mean? Proprietary means a physical or electronic design which doesn’t conform to industry standards. So industry standard parts like M.2 SSDs cannot be used in many Apple models Late 2012 and newer; only Apple parts or specialty replacement parts engineered to conform to Apple’s specifications can be used. Confusingly, Apple has used at least 6 different proprietary SSD designs in the past 8 years, so matching part to machine year and model is especially important.

iMac machines continued to use spinning hard drives, but added a SSD slot on some models for a “Fusion” drive, which is a combination of hard drive and a small SSD for caching reads and writes for higher speed. The Fusion drive set can be broken to use the SSD and hard drive separately. RAM is easily upgradeable in the 27 inch iMacs to date, with a trap door on the back of the machine. However the 21 inch models put the RAM internally. The Retina screen iMacs from Late 2012 onward make it difficult to access the internals for upgrading drives (and RAM on the 21 inch) as the screen is glued to the machine, and has to be carefully unglued to access the motherboard and drives. CanadaRAM sells OWC kits with the tools and adhesive for reinstalling the screen. This service should only be attempted by technician or an owner who is experienced with disassembly.

The iMac Pro model uses SSD drives only, and there are currently no aftermarket options but it is upgradeable in RAM (using server-class ECC DIMM memory) with the same caveats about installation behind the Retina screen.

The 2013 Mac Pro (cylindrical, black model) deleted the ability to have internal hard drives, and went with a proprietary SSD format. It still has four RAM DIMM sockets for upgrading.

The 2019 Mac Pro also has 2 SSD sockets, and eight RAM DIMM sockets. We are awaiting word on third party SSD compatibility, and there are also PCI-e card options for high speed RAID SSD setups.

Mac Mini machines were produced in several variants. 2.5 inch SATA drives continued to be used up to the Late 2014 model. Blade SSDs were introduced on the Late 2014 model together with a 2.5 inch SATA drive, the 2018 model has only a PCI-e SSD socket. RAM upgrades are not possible on the Late 2014, but DDR4 upgradeable RAM returned in the Mini 2018 model.

MacBook machines newer than the 2010 model have no internal upgrade options at all.

MacBook Pro machines from Late 2012 used a variety of Apple specific drives.
The 2013-2014 MacBook Pro and MacBook Air models originally used an ACHI version of SSD. Apple later changed to NVMe SSD drives. There are some issues with fitting a NVMe replacement SSD drive to Late 2013 and 2014 MacBook Pros that originally shipped with ACHI SSD drives. Although OSX supports booting from NVMe SSDs from OSX 10.13 onward, the firmware in the earlier generation Retina MacBook Pros and Airs does not handle the Standby (Hibernate) mode of the Sleep function properly. The 2015 models do not have this problem.

More on the issue here https://eshop.macsales.com/Service/Knowledgebase/Article/26/785/NVMe-SSDs-Standby-Mode-Issue

Canadaram carries OWC and Transcend have SSD drives that are designed for specific Macintosh models.

This is a bit complex because there are many models of Macs. This list is ordered by the the type of Mac and then Macintosh ID number which roughly corresponds to the model date. Some models have both SATA drive connectors and SSD connectors, some have only one or the other.

iMac
iMac13,1
Late 2012 Early 2013 21.5 inch SSD slotSSD Upgrade Except not in iMac13,1 21″ Oct 2012 2.7GHz modelDDR3-1600 SODIMM
iMac
iMac13,1, iMac14,1, iMac14,3
Late 2012- Early 2013 21.5 inch drive bay2.5 in SATA 6G Requires adhesiveDDR3-1600 SODIMM difficult install
iMac
iMac13,2
Late 2012 27 inch SSD slotSSD slot requires adhesiveDDR3-1600 SODIMM difficult install
iMac
iMac13,2, iMac14,2, iMac15,1,
Late 2012-2014 27 inch drive bay3.5 in drive bay will take 2.5 in SATA 6G Requires Bracket thermal cable and adhesiveDDR3-1600 SODIMM
iMac
iMac14,1, iMac14,3
2013 21.5 inch SSD SlotSSD slot requires adhesiveDDR3-1600 SODIMM
iMac
iMac14,2, iMac15,1
2013-2014 27 inch SSD SlotSSD Slot requires adhesiveDDR3-1600 SODIMM
iMac
iMac14,4, iMac16,1, iMac 16,2
June 2014, Late 2015 21.5 inch SSD SlotSSD slot only in Fusion Drive modelsNot upgradeable
iMac
iMac14,4, iMac16,1, iMac16,2
June 2014 – Late 2015 21.5 inch drive bay2.5 in SATA 6G Requires adhesiveNot Upgradeable
iMac
iMac17,1
Late 2015 27 inch drive bay3.5 in drive bay will take 2.5 in SATA 6G Requires Bracket thermal cable and adhesiveDDR3-1867 SODIMM
iMac
iMac17,1
Late 2015 27 inch drive bay3.5 in drive bay will take 2.5 in SATA 6G Requires Bracket thermal cable and adhesiveDDR3-1867 SODIMM
iMac
iMac18,1, iMac18,2, iMac19,2
2014 – 2016 21.5 inch drive bay2.5 in SATA 6G Requires adhesiveDDR4-2400 or DDR4-2666 SODIMM difficult install
iMac
iMac18,1, iMac18,2, iMac19,2,
2017-2019 21.5 inch SSD SlotSSD slot requires adhesiveDDR4-2400 or DDR4-2666 SODIMM difficult install
iMac
iMac18,3, iMac19,1
2017 – 2019 27 inch SSD SlotSSD Slot requires adhesiveDDR4-2400 or DDR4-2666 SODIMM
iMac
iMac18,3, iMac19,1
2017-2019 27 inch drive bay3.5 in drive bay will take 2.5 in SATA 6G Requires Bracket thermal cable and adhesiveDDR4-2400 or DDR4-2666
iMac Pro
iMacPro1,1
Late 2017No SSD available at this timeDDR4-2666 ECC R DIMM
MacBook
MacBook8,1, MacBook9,1, MacBook10,1,
2015 – 2017 12 inch RetinaNot Upgradeable, external drives onlyNot Upgradeable
MacBook Air
MacBookAir5,1
Mid 2012 11 inch SSD Slot Not Upgradeable
MacBook Air
MacBookAir5,2
Mid 2012 13 inch SSD Slot Not Upgradeable
MacBook Air
MacBookAir6,1
Mid 2013 – Early 2014 11 inch SSD Slot Not Upgradeable
MacBook Air
MacBookAir6,2
Mid 2013 – Early 2014 13 inchSSD Slot Not Upgradeable
MacBook Air
MacBookAir7,1
Early 2015 11 inch SSD Slot Not Upgradeable
MacBook Air
MacBookAir7,2
Early 2015 – Mid 2017 13 inchSSD Slot Not Upgradeable
MacBook Pro
MacBookPro10,1
Mid 2012 Retina – Early 2013 15 inchSSD Slot Not Upgradeable
MacBook Pro
MacBookPro10,2
Late 2012 – Early 2013 Retina 13 inchSSD Slot Not Upgradeable
MacBook Pro
MacBookPro11,1
Late 2013 – Mid 2014 13 inchSSD Slot Not Upgradeable
MacBook Pro
MacBookPro11,2, MacBookPro11,3
Late 2013 – Early 2014 15 inchSSD Slot Not Upgradeable
MacBook Pro
MacBookPro11,4
Mid 2015 15 inchSSD Slot Not Upgradeable
MacBook Pro
MacBookPro11,5
Mid 2015 15 inchSSD Slot Not Upgradeable
MacBook Pro
MacBookPro12,1
Early 2015 13 inchSSD Slot Not Upgradeable
Mac Mini
MacMini5,1, MacMini5,2, MacMini5,3, MacMini6,1, MacMini6,2
Mid 2010 Server, Mid 2011 – Late 20122.5 in SATA 6G up to 2x drives, requires bracket and cableDDR3-1066, DDR3-1333 or DDR3-1600 SODIMM
Mac Mini
Macmini7,1
Late 20142.5 inch SATA 6GRAM Not Upgradeable
Mac Mini
Macmini7,1
Late 2014SSD Slot RAM Not Upgradeable
Mac Mini
Macmini8,1
Late 2018No SSD update available – soldered inDDR4-2666 SODIMM
Mac Pro
MacPro4,1, MacPro5,1
2010-20124x 3.5in bays can take 2.5 in SATA 6G Requires BracketDDR3-1066 or DDR3-1333 ECC DIMM
Mac Pro
MacPro6,1
Late 2013Cylindrical black Mac Pro No HDD, one SSD blade onlyDDR3-1867 ECC DIMM
Mac Pro
MacPro7,1
2019 Tower and 2019 Rack2x SSD slots. No SSD upgrade at this time. PCI-e Slot upgrade card optionsDDR4-2666 or DDR4-2933 ECC DIMM

Posted in Computer Questions and Answers, Hard Drives and SSD, Mac questions, Upgrading | Tagged , , , , , , , , , , , , , | Leave a comment

Q. Overclocking RAM, what does that mean?

Q. I have heard of overclocking RAM – Is this possible at all?

A. Yes, a computer has a standard memory speed it is designed for, and it is possible to increase the memory speed, if your memory and computer BIOS are capable of doing it.
Before you go too much further, many notebooks, business desktop computers and entry level name brand machines do not let you access the BIOS to make changes, so overclocking is a non-starter with those machines.

Its All About the Timing: All memory is sold with a set of timings that the manufacturer guarantees it will work at. Typical timings might be DDR4-2400 (2400 MT/s – often incorrectly called 2400 MHz) at CAS Latency 17 (CL17). The higher the MT/s the better, the lower the CL number, the better. The two measures are linked, the overall speed is a combination of the transaction rate AND the number of clock cycles it has to wait for latency.

You can improve the performance of your machine by increasing the memory speed (MT/s) and lowering the latency (CL) by adjusting the settings in the motherboard’s BIOS. Whether you can speed the memory up depends on:

  • Your BIOS, and whether the manufacturer allows you to change the settings,
  • Your memory controller, which is built into the CPU of all modern machines,
  • Your motherboard, whether it can deliver stable voltages to the memory, and
  • The memory itself, whether it can keep up with the faster timings.

The numbers interact – its more difficult to maintain low latency in a chip as the speed goes up. In performance testing, a tight latency DDR4-3200 CL14 setup performs approximately the same as a DDR4-3600 CL16 setup. What the 3600 gains in speed it gives away in extra latency. Here’s a simple latency calculator that does the math so you can compare the actual latency time in nanoseconds.

Buying memory: Memory for overclocking is sold (often marketed as Gaming memory), by a number of manufacturers. Each kit will be selected and tested to perform at higher than standard speeds. The price goes up rapidly as the speed ratings go up and the latency goes down, mainly because the manufacturers have to sift through the component chips to find the few that will tolerate higher speeds. When a memory kit is rated at, for example, 4000 MT/s that means that its maximum speed is 4000 MT/s. But you can set it to any speed you like under that maximum. Its important to remember that the RAM modules doesn’t set the speed, the BIOS does. In fact, it you plunked that expensive 4000 kit into a motherboard stock, it would run it at the standard JEDEC speed of 2133 MT/s or perhaps 2400 MT/s. It won’t run faster speeds until you adjust the BIOS yourself.

What does your CPU want? Your CPU has a “native” maximum speed at which it is guaranteed to handle RAM. The supported maximum native speed of the AMD Ryzen 3xxx series is 3200 MT/s and the 9th generation Intel Core CPUs is 2666 MT/s. RAM at these speeds are the safe choice right out of the box.

Beyond those speeds, you can dial in your own BIOS settings for speed and latency, or if the memory and the BIOS both support it, you can enable XMP (eXtreme Memory Profile) and choose one of the ‘standard’ XMP overclocking profiles. Motherboards sold for gaming and do it yourself builds often come with enhanced BIOS screens, or Auto Tuner or Intelligent Overclock Assistant apps to make it easier to experiment.

Every manufacturer’s BIOS looks a little different, but the basics will be there under DRAM Speed or Memory Clock and the details of latency under DRAM Timing.

You can do some research online for the best combination of MT/s and CL rating for your particular processor. The general consensus is that AMD processors benefit more from faster memory performance than Intel.

Also, any computer that uses on-board graphics (the video ‘chip’ embedded in the CPU chip) will benefit disproportionately from faster RAM, because the same System RAM memory is used for Video memory, rather than the GPU on a discrete video card having its own fast GDDR video memory to work with. In a shared video memory setup, slow RAM will compromise video performance as well as general computing performance.

AMD Ryzen2: AMD suggests that the ‘sweet spot’ in performance for Ryzen 3xxx CPU line is 3600 MTs. For technical reasons, memory performance actually slows down when the clock is pushed further than 1800 MHz (recall that DDR memory executes 2 operations on each memory clock tick, so 1800 MHz mclock = 3600 MT/s DDR4 speed). You can make up the performance with some custom timing tweaks, but for most people, the XMP profile at 3600 MT/s is going to be the easiest and most reliable overclock. So for this approach, setting the mclock to 1800 MHz, (DDR4-3600) and then reducing the latency settings, would be the way to go. For a smaller budget, get the lowest latency DDR4-3200 MT/s that you can afford.

Intel: For Intel Core 9th generation CPUs, its not so easy to generalize, because it depends a lot on what software you are using. In tests for gaming performance, there was little improvement going higher 3000 MT/s CL14. In graphic professional software, 3000 MT/s CL14 was good, but a low latency 3200 MT/s setup seems optimal. In the exceptional cases of doing intense 3D rendering, compression and encoding, faster RAM in the 3600 MT/s range can deliver improvements

No Guarantees: Even if memory is rated for a high speed, it doesn’t mean that your particular combination of memory, CPU and motherboard will be stable at the highest speed. Every overclock is a trial and error process, and is partially dependent on the luck of the draw: whether your individual chips will handle aggressive timings or not. Needless to say if you overclock the memory beyond the rated speed of the RAM module, all bets are off; you can expect instability and worse.

Really No Guarantee: Reaching the highest speed of a memory module usually requires boosting the memory power supply voltage above the standard 1.2V (for DDR4). You should investigate the voltage range that the memory modules are guaranteed to tolerate, and if you exceed that voltage, it is at your own risk. RAM damaged from over voltages may not be covered by the manufacturer’s warranty.

Q. So if I can overclock, is it advisable?

A. It depends. If you are seeking the fastest performance for your machine bar the cost, then you would invest in faster RAM. The investment will not only be in the more expensive RAM modules, but in considerable time on your part to adjust and test the machine until you arrive at the fastest stable speed.

If you want stability and long life, (or simply less hassle) you will stay with the manufacturer supported speed ratings.

One thing you will find quite quickly when overclocking RAM, is that if you push the speed too high or the latency timings too tight, the chips on the memory won’t be able to keep up, and the machine will crash, either at boot up, or worse, sporadically as you are using it. So you want to pull back one or two steps from the edge in order to maintain stability.

Also, achieving higher speeds often means increasing the voltage supply to the memory, which generates additional heat, and in general could mean that the memory will fail sooner as it is under greater stress. Worst case scenario is that going to far with voltage increases could damage the CPU as well. These voltage related failures would theoretically void the warranties of the hardware.

More about Latency: In simple terms, Latency is the amount of time that the memory chip needs to return information from a request. This imposes a pause between successive operations. CAS Latency (CL) is the most common measure and is an easy shorthand for the performance of the memory chip. But there are several other measures of latency, which is why you may see RAM modules specified as, for example CL 16-18-18-36 The first figure is the CAS Latency (CL16). Here is an article which discusses latency in more detail.

Posted in General Computer, Memory, Q&A | Tagged , , , , , , , , | Leave a comment

Q. Do I upgrade my Drive or my RAM?

Q. What is better, a SSD Drive upgrade versus a RAM upgrade?

A. It depends a lot on what you are doing with your computer, whether you have an adequate amount of either right now, and what your goals are.

RAM is the first thing to look at – you need to have *Enough memory, or your machine will be perpetually slow, especially when switching from one program to another. The tricky part is determining what is *Enough. Your operating system consumes some memory right from the start. It used to be you could get by with 4 GB RAM, but with the latest versions of Windows and Mac OS machines really need a base of 8 GB to run efficiently with a few programs. Heavy multitasking wants 16 GB or more or memory. The thing is, once you have *Enough memory for the work that you are doing, so that you are not having to use hard drive Swap files often (see below), then adding more memory than that does not do much to speed up your computing further. The relative improvement is great for upgrading to the Enough point, then the curve starts flattening out after that.

If you are using programs like pro level audio and video creation and editing, 3D modelling, scientific, architectural, photo manipulation and design — well, many of these programs will use all the RAM you can throw at them, 32 GB and up to 128 GB on professional workstations. Check with the requirements for your specific programs.

Once you have *Enough memory for your particular workflow, then you can look at speeding up the drive storage situation. Obviously, if you are literally running out of drive space, you want to make upgrading a priority. But most people (with a little storage discipline and throwing out unneeded files) can live comfortably within a 500 GB drive space. The two goals with drive upgrades are to get faster storage, and to get ample storage for what you do. Upgrading from a spinning hard drive to a Solid State Drive (SSD) makes a major improvement to speed, as SSDs are capable of performing 5 times (or more) faster than hard drives in typical use.

Q. When to do either?

A. When your machine is not keeping up with the demands your software is putting on it, or if the hard drive is showing signs of trouble (how to test your hard drive – Windows) or if your file storage needs exceed the size of the drive.

Having too little RAM when you open multiple programs causes the operating system to swap memory contents onto the drive to make room for more data in memory, then read it back from the drive when that memory is needed again. These are called Swap files or Virtual Memory files. The problem is, a drive is hundreds of times slower than RAM memory, so this causes a noticeable wait while the swap is executed. The more multitasking of programs you do, and the larger the programs and data sets, the worse this gets. This is why the first order of business is to make sure you have Enough RAM.

Then, if you find that your drive is excessively slow, or is completely full, you would consider a faster and larger drive. Spinning hard drives slow down as they get full (the inner tracks are shorter and pass less data under the read/write heads every rotation). If your drive is over 80 % full it’s time to take action, either clean up your data by deleting unneeded files and copying archival files off to external storage. If your drive is over 90% full you are probably already experiencing severe slowdowns in reading and writing.

In either case, a SSD drive is so much faster than a spinning hard drive, and prices have come down to the point where they are an obvious choice in the 1 TB and under sizes. If your machine can take 2 drives, you could put your operating system, programs and current user data on the SSD, and leave the less-used larger file storage on the larger slower hard drive.

As a starting point, the data that consumes the most drive storage are: Videos, Photos, Music, and Downloaded installers and updaters. Decide which of these you either don’t need, or are OK on archival storage, or on an external hard drive or network storage.

Q. I read that upgrading my HDD to SSD is great but should I do this or should I increase my RAM memory?

A. Ideally, you will do both, in balance with each other. But if you have to choose just one upgrade, getting your machine to *Enough memory (as above) is the first priority.

One important exception: Some machines are architecturally limited in how much memory they can recognize. If your machine tops out at, say, 4 GB of memory, then upgrading to a SSD drive is important. You will not be able to stop the operating system from using Swap files frequently, but because SSDs are so much faster than hard drives, particularly in accessing many, small files quickly, an SSD will cut down on the waiting time for Swap file access by a factor of 3 to 4.

Q. I like to keep lots of open tabs in my browser, does it make any difference?

The more you multitask, the more RAM you need. Usually we think of multitasking as running separate programs at once, but it affects browsing habits as well. Google Chrome for example opens a new process for every tab you have open, which can consume many gigabytes of RAM if you open a lot of tabs. Chrome (and the rest of your machine) will run better if you have plenty of RAM to spare. If your work process involves opening many tabs as well as running other applications, look to 16 GB of RAM or more to keep your machine running smoothly.

Lastly, I encourage you to add archiving and backup to your list of considerations. There is no substitute to having a current and usable backup of your data, if you should have a drive or machine failure. You should ideally have more than one backup, including a longer term backup that is kept in a different location.

When you are considering your hard drive requirements, think of how much of your file storage isn’t used on a regular basis and can be archived. If there is a group of files that will be accessed once in a blue moon, if ever, these could be moved off of your main drive to some secondary storage, perhaps on an external drive. Pay some thought how you could organize a filing system that would allow you to find the archived files 5 years from now.

Check with Canadaram.com for the correct RAM and SSD upgrades for your machine

Q&A is a compilation of questions we have answered around the Web

Posted in General Computer, Hard Drives and SSD, Memory, Q&A, Upgrading | Tagged , , , , , , | Leave a comment

Q. Why isn’t my new vocal microphone working?

Q. I just bought a new microphone, and I have plugged it in and there is no sound. Is it broken?

A. Chances are, your microphone is a condenser microphone, either a large diameter diaphragm or small diameter diaphragm mic or a handheld condenser mic, and you don’t have phantom power being supplied to the mic to run it.

The two main types of microphones are dynamic and condenser.

  • A dynamic microphone uses a membrane connected to a coil and magnet system, which generates electrical sound signals when the coil is moved by sound. (It is the inverse of a speaker, which creates sound when its coil is moved by electrical signals).
  • A condenser microphone has a thin, electrically conductive diaphragm very close to a metal backplate. When sound hits the diaphragm it varies the distance between it and the backplate, which alters the capacitance of the system. It is this variance in capacitance which is amplified and turned into an electric sound signal.

Q. How can you tell which type you have?

A. Large vocal recording mics (the type where you sing at side of the mic, called side-address) are usually condensers (some are ribbon mics which have their own power requirements). Small ‘pencil’ mics are also often condensers.

The typical handheld style microphone is often dynamic, but could also be a condenser, so you have to check the model.

Q. Why is the type of mic important?

A. The key difference is that the condenser element must have electrical power to work, either batteries or power provided by a power supply.
The most common source of microphone power is phantom power, which is 48V DC power that is sent up the 3 conductor XLR cable to the mic.

Phantom power is supplied by the pre-amplifier or mixer input that the microphone is plugged into. Sometimes, an external adapter is used to inject the power if the preamp or mixer does not have phantom power capability.

So a vital questions to ask if a microphone isn’t working are

  • “Does the mic require phantom power?”, then
  • “is the mic input I am using capable of supplying phantom power?” and
  • “is phantom power turned on, on the input channel I am using?”

Phantom power on a mixer may be switched on or off per channel, or it may be a global switch, or it may only affect a certain number of channels. Look for a switch that says 48V. https://www.behindthemixer.com/phantom-power-and-when-use-it/

It’s obvious once you think about it, but if you use a microphone cable which has the 3 pin XLR connector adapted to a 1/4 inch plug (guitar cable style), you won’t be able to use phantom power, both because you will be lacking the three conductors of the XLR connection (and because equipment never presents phantom power on 1/4 inch jacks).

Phantom power shouldn’t hurt a dynamic microphone if it is accidentally applied, but it could damage other audio electronics, so leave it turned off if you don’t need it.

A few other things to look for if your microphone isn’t producing sound.

  • If there is a switch on the mic, make sure it is turned on.
  • If the mic requires a battery, make sure it has a fresh one, installed the correct way ’round.
  • If you are using a mixer or a preamp, make sure that the Mic/Line level switch is set to Mic,
  • Make sure the Mute button on the mixer or preamp is not engaged
  • Turn up the input gain (or Mic gain) on that channel so that the level meters are showing in the green (back off the gain if the meter shows red). Microphones put out a much lower level signal than a keyboard or other electronic equipment, and need to have more gain applied.
  • Test the cable with a known-good mic to make sure the cable is OK
  • If you have a USB microphone, one that directly connects to the computer with a USB cable, then it draws its power from the USB jack to power the condenser element (if it is a condenser), the preamp and the A/D converter inside the mic that creates the digital USB signal. These mics don’t need phantom power separately. If your machine’s USB port does not supply enough power, the mic may not be able to function. Try another USB port on the computer, or attach the mic to a powered USB hub that has an AC Adapter to power all its outputs.
    Extended USB cables (more than 20 feet) sometimes have a USB signal booster built in, this takes USB power away from the peripheral (mic, camera, or whatever) and may not allow them to function. The solution again may be to use a powered USB hub at the far end of the cable.

Posted in Music recording, instruments, hard & software, Q&A | Tagged , , , , , , , , , | Leave a comment

Q. Why do I have to install my RAM modules in pairs?

Q. Why do I have to install my computer memory modules in pairs?

A. Normally a motherboard addresses memory through a 64 bit data channel. When a computer motherboard is designed to use Dual Channel memory access, it can address two identical RAM modules with two 64 bit channels of data flow (or one 128 bit channel in ganged mode). This improves the memory bandwidth (by a theoretical 2 x – however the effect on real world performance is more like 5% – 8% improvement with memory intensive applications). https://en.wikipedia.org/wiki/Multi-channel_memory_architecture#Dual-channel_architecture
So installing a dual channel pair gives a small but welcome speed improvement over the same amount of memory in single channel.

Q. What happens if I do not?

A. The vast majority of consumer computers will run in Single Channel access mode, so the computer will still run. Sometimes a single module must be installed in a specific slot to be recognized, consult the user manual. A few higher end machines and servers will not run without pairs or other particular configurations of memory – check your owners manual.

Q. If the total RAM is recognized why does it matter if they are in pair or not?

A. Even if the memory is not a matched pair, most machines will recognize the full amount of RAM and run. You would just be giving up the potential speed benefit of Dual Channel memory access

Q. Do I have to buy special Dual Channel RAM modules?

A. There is no difference to the memory module, whether it is used as a single, or as a member of a dual channel pair. They are the same modules, manufacturers simply sell kits of 2 as a convenience to know you are getting a matched pair.

Q. So then, could I take any two random modules and put them in to work in Dual Channel access?

A. It’s a little more involved than that. Whether two modules can be paired as a Dual Channel set depends on the memory controller of the machine (which these days is embedded on the CPU). A few motherboards can address dissimilar modules in Dual Channel, and some motherboards are extremely restrictive in what they will recognize.

The official answer is that the two modules must match for Speed, Size and Composition. The first two are easy to determine, but Composition means how the module is made, the number and density of memory chips on it, and how those memory chips are organized in rows and columns of addresses. You don’t have an easy way to know the internal organization of the module. Although two modules from different manufacturers may match sufficiently to be a Dual Channel set in your motherboard, the easiest way to know is to install two matching model numbers from the same manufacturer as a kit.

Q. Is there higher than dual channel access?

A. Some machines implement triple- or quad-channel access. Six- and eight- channel access is usually seen only in higher end servers and workstations with two or more processors. On those machines, pay particular attention to the memory population rules in your owners manual.

Check with Canadaram for advice on the correct memory configurations for your particular machine

Q&A is a compilation of answers we have given to questions around the web

Posted in Computer Questions and Answers, Memory, Q&A | Tagged , , , , , | Leave a comment

Q. My machine feels slower than before, what do I do?

Q. My machine feels slower than before, I have done all I know to make it feel like before but no luck – do I need to upgrade?

A. Performance slows when your software demands more than your hardware can deliver. This may be because you are running newer software with higher requirements, or you are running more software at once than you did before.

“Software” here includes all startup and background processes including anti-malware, cloud storage apps, communications apps like Skype, control panels for video cards, background downloading programs, as well as the programs that you actually have launched on your desktop).

Upgrading your drive and RAM are the fastest ways to restore speed to a machine without replacing the machine. We’ll go over some checklist items that you should do before upgrading, in any case.

Let’s cover one thing right away. If your hard drive or SSD drive is failing, a symptom can be extreme slowness across all applications. If you suspect that is the case in your situation, then backup your drive ASAP, and then test it and replace it with a new drive as necessary. How do I clone my hard drive to a new SSD (Windows 7)

The first order of business, which I assume you have already done, is to do a thorough check for malware. Run a full scan with a fully updated version of your main antivirus program, then do a second-opinion scan with Malwarebytes and/or SuperAntiSpyware.

Then go through your machine with a fine toothed comb, and disable or delete all processes that load up at Startup which you do not need. The programs CCleaner from Piriform and Autoruns from Microsoft, are convenient ways to investigate and turn off startup processes. If in doubt, Google the name of the process or software first to find out what it is, there are some which shouldn’t be disabled because the system relies on them.

One diagnostic to see if you have a software problem is starting your machine in Safe Mode with Networking. If the machine speed returns to normal when you are in Safe Mode, then it is a sure bet that your culprit lies among your startup items in your regular startup profile.

Sometimes, if you are having crashing problems as well as slowness, it could be your Windows installation has corrupted files. You can repair your Windows with the All-in-One windows repair utility from Tweaking.com (or roll your own repairs with command line tools such as CHKDSK, DISM and SFC – Google for instructions).
Alternatively, you could elect to do a repair install of Windows, or reinstall Windows from scratch, which involves a lot more effort at backing up data, then reinstalling your application software and restoring the data. The advantage is that you will know you have all fresh Windows and Application code on the machine.

The next step is to check your hardware environment, starting with Memory
Is your memory working properly? Check that the full amount is registering with Windows, and use a memory test application like Memtest86 to check that there are no errors.

How much memory do you have? Upgrading to enough RAM is the first and most essential part of restoring the speed of a machine. 8 GB is the functional minimum for running Windows 10, but if you do a lot of multitasking, 16 GB is better if your machine will take it. (If you have specific content creation software or engineering or scientific software, then your “enough” RAM level could be higher than that). Consult with your RAM supplier or Canadaram.com to find the correct RAM for your machine and what its capacity is.

Next, look at your Hard Drive.
Is it working properly? Do a test of the hard drive
Is it full? Check the Properties on the main drive.
When a hard drive (the spinning variety) gets over 50% full it starts to lose speed, and performance can be really compromised if it is over 90% full. Cleaning out unneeded files is the first order of business.

If you have a working, not over-full hard drive and are still suffering from speed problems, the next step is to replace the hard drive with a solid state drive (SSD) which can be up to 5 times faster than a hard drive. Most machines can be upgraded to a SSD either as a direct swap for an old 2.5 inch drive, or with a few parts to adapt the SSD to a 3.5 inch mount. Check with Canadaram.com for the SSD options for your machine.

You can install the new drive into the computer and put your old drive into a USB – SATA adapter or enclosure, and clone the old drive to the new drive, which preserves your operating system, programs and user information. HDClone or Acronis TrueImage are two programs that make the cloning process easier. Some models of SSD come with free cloning software available as a download from the manufacturer. Or, you could elect for a fresh install of Windows and applications as above.

Summary: Unless the machine’s CPU is so out of date it can’t run the software you want, upgrading to a SSD drive and enough RAM memory is the most effective way to restore performance and preserve your investment in your machine.

Q. I only use my machine to read Email and ran the occasional application, just as  always, but things have slowed down, why?

A. Quite often, you notice slow downs when you install an operating system upgrade, or a new version of a program, or a new program that runs in the background. With operating systems, you don’t have much say around how many resources they take. It’s not really an option to decline system updates, either, because they are often patching vulnerabilities and you don’t want to remain unprotected.

First thing is to eliminate malware and hardware failure as a cause. Go through the steps listed above. Then consider if you want to upgrade your machine to an SSD drive and/or extra RAM memory.

Q&A is a compilation of questions we have answered around the Web

Posted in General Computer, Performance, Q&A, Upgrading | Tagged , , , , , , , , | Leave a comment

How to test a hard drive (Windows)

First. last and always – Back up

There is no substitute for having regular and verified backups of your data. If you don’t have a backup routine, you need to establish one, ASAP.

How do I know a drive is failing?

When your hard drive is failing it can cause a variety of problems. Some of the symptoms of a drive going bad can be:

  • Reading, writing and copying errors when using data on the drive
  • Unusually slow performance across many programs, on the desktop, or booting
  • Failure to boot up, or error messages while booting
  • Random crashes or spontaneous reboots.

Keep in mind that these symptoms are not exclusive to failing hard drives, there can be other causes that mimic a bad drive. If your problems go away when you boot the computer in Safe Mode, then it is more likely a software issue.

SSD drives often don’t give much, if any, warning of failure. That makes it doubly important to maintain regular backups, and do periodic health testing as below.

Tools for testing your drive

There are a number of software tools for testing a hard drive. Some are run from the command prompt (C:> ), some from within Windows and some can be run from a boot CD or USB stick.

  • Windows comes with a command line utility CHKDSK to test the hard drive, and repair some errors. Access it by opening the Command Prompt (in Windows System: Command Prompt in the Windows menu, or Search for Command Prompt). Type in CHKDSK /f and hit return. You may get a message that the volume is in use, and the check will be scheduled for the next restart. That’s fine, you can restart the machine when you are ready to run the check.
    If you’re unable to boot into Windows, you can boot from a Windows CD or USB stick, and/or enter the Recovery Console, and run CHKDSK /f  C: to fix errors on the C: drive (substitute the drive letter if your suspect drive is different).
  • Test the SMART status of the drive (the self-testing and reporting function of the drive) with CrystalDiskInfo
  • Drive manufacturers often offer free diagnostic programs, some of these only work on their own brand of drives
    Seagate: SeaTools
    Hitachi/HGST: Drive Fitness Test
    Western Digital: Data Lifeguard
    Samsung SSDs: Samsung Magician (For older Samsung hard drives, use the Seagate SeaTools)
    Toshiba: Toshiba Storage Diagnostic Tool (download from the Tools links)
  • TestDisk and HDDScan are free, open-source programs to test drives and TestDisk can repair certain drive and directory errors.

If you cannot boot up Windows, you can build an Ultimate Boot CD on a working Windows machine (beware of the advertising and third party download links on that page). The Ultimate Boot CD creates a bootable CD drive or USB stick, and contains a variety of software programs for testing drives, repairing and recovering data.

When to replace the hard drive

If your drive is failing or is showing SMART errors, your best bet is to backup your data from it ASAP, and replace it more sooner than later. Drives don’t get better on their own, they will get progressively less reliable and then fail completely without notice.

In fact, our advice for mission critical machines in busy office, creative and production environments, is to replace the main hard drives on machines before they fail – on a regular scheduled rotation. It’s cheaper to budget a couple of hundred dollars every 2 to 3 years, than it is to spend hundreds or thousands of dollars on lost work and emergency repairs or data recovery when they fail. By rotating in new drives, you will also benefit from larger storage and faster performance, and be continually covered by manufacturer’s warranties. The older drives in good condition after testing, can be moved to a secondary, less critical use.

Check if your drive is covered by warranty – hard drive and SSD warranties range between 1 and 5 years, you can query your serial number at the manufacturer’s website. Warranties do not cover data recovery however.

Keep in mind that if it is the original drive that came with the computer, then the warranty is with the computer manufacturer, not the drive manufacturer, and expires with the warranty expiration date of the computer. (The drive company sold the drive at a discount to the computer manufacturer in exchange for the computer manufacturer assuming responsibility.)

Posted in Computer Questions and Answers, Hard Drives and SSD, Windows questions | Tagged , , , , , , | Leave a comment

Q. Why can you sometimes upgrade RAM to more than the manufacturer suggested?

1. How is that I can install more memory on my Apple machine than Apple supports?
A. When manufacturers release a machine, the manuals are written with the available information at that time – for example, a machine may be specified with two 4 GB DDR3 modules for 8 GB total. If larger memory modules were not available at that time, they may not have been tested or included in the manuals or specifications.

Sometimes, after new, larger modules are introduced, they might be tested and the machine found to support them, such as two 8 GB modules for 16 GB total. But manufacturers seldom go back to correct the documentation or official specifications of the machine, they are on to a new line of machines by then, so the documentation would still say 8 GB maximum

Check with the memory manufacturer or Canadaram to see if they have tested and certified their modules as compatible with your specific model of machine.

Be aware that sometimes, a machine needs updated firmware, or a newer operating system, before it is able to recognize a larger memory module.

Another thing to realize though, is that memory modules can be built in many different ways; for example in the number of memory chips on them, the number of ranks, and the way the rows and columns of memory are organized. So if your machine does support a larger module, it may require a specific build of chip to make it work.

One rule of thumb is that if the machine takes a 4 GB module with 8 memory chips on it, it may well need to have 16 memory chips on the 8 GB module. It’s about the density of the memory modules; the memory controller of the machine can count only up to so many memory locations per chip. If you install a high-density 8 GB module with 4 or 8 chips on it, the machine may not be able to address the memory. When in doubt, try a dual rank, low density module.

2. What if I ran into issues?
A. It’s not a given that a machine will support larger memory modules even if they physically fit. If the BIOS or memory controller doesn’t support it, the machine may crash at boot up, or it may boot but only show half of the memory. Occasionally a machine will seem to work fine until you load enough programs to start accessing memory over its limit, and then it will crash. So test your memory before you start using the machine for real. You can use a program like Rember (Mac) https://www.kelleycomputing.net/rember/ or MemTest86 (Win) https://www.memtest86.com/ to thoroughly test the memory.

3. Does it mean that I can use DDR4 when the machine has DDR3
A. That’s a no. The different memory standards DDR2, DDR3, DDR4 have different pinouts and are different electronically, so you cannot ‘upgrade’ a given machine from DDR3 to DDR4.

Once upon a time, there were a few motherboards made that straddled the introduction of new memory standards, and put both the old and the new memory slots on them (two DDR2 and two DDR3 slots, for example) But these motherboards cannot use both standards at once – it’s one or the other.

Posted in Computer Questions and Answers, General Computer, Memory, Q&A, Upgrading | Tagged , , , , , , , | Leave a comment

Q. My old MacBook Pro is dead. How can I run its internal drive with OS X 10.11 as an external drive?

A. First, what year and model of MacBook Pro is it?

If it is a 2012 or older, it is simple, because it is a 2.5 inch SATA drive. You’ll remove the hard drive and put the drive into an external 2.5 inch SATA to USB 3.0 case.

Seagate 2.5 inch SATA hard drive

Open the bottom case of the machine with a Philips #00 screwdriver, and remove the hard drive. Be careful you don’t rip the thin black SATA ribbon cable as you unplug the drive.

Then you will need to remove the Torx T6-bit four studs on the sides of the drive before installing in the USB enclosure. Keep these studs with the machine.

External 2.5 inch USB drive enclosure

You will then be able to read the drive on another Mac (but not a Windows PC, unless you install some additional software to read the Apple drive format).

If you have a Late 2012 or later Retina MacBook Pro, MacBook Air or MacBook machine, you have a proprietary Apple SSD blade and not a hard drive.

One of several different proprietary Apple SSD formats (not compatible with M.2).

Consult with CanadaRAM.com to choose the correct external OWC Envoy or Envoy Pro USB enclosure to fit your machine’s particular drive. Pay attention to the details, as the drive specifications changed year to year and model to model.

OWC Envoy enclosure and SSD
One of several different designs of OWC Envoy external USB enclosure for Apple SSDs

If the MacBook Pro machine were running, you could put it into Target Disk Mode https://support.apple.com/en-ca/guide/mac-help/mchlp1443/mac by holding down the T key through startup. This allows you to connect to the machine from another Mac and access the hard drive as an external drive. But this requires successful booting to at least the firmware to do this, so it won’t work if the machine doesn’t power on.

Q&A is a compilation of questions that we have answered around the Web

Posted in General Computer, Hard Drives and SSD, Mac questions, Q&A | Tagged , , , , , | Leave a comment

Q. I have a broken iMac Mid 2011. Can I re-use the iMac’s SSD drive with a Windows machine?

A. Your iMac Mid-2011 came standard with a 3.5 inch hard disk drive.
(Note: The Apple Fusion drives were not brought out ’til the Late 2012 model, so your particular iMac has no socket for a SSD blade).

Therefore, the SSD you have in the machine must be a aftermarket add-on, and it will be the 2.5 inch SATA format. All you need to do with this drive after removing it, is to re-partition it on a Windows machine into MBR or GPT partitions, then format the volumes as NTFS and you are good.

2.5 in SATA 
Solid State Drive

In general, Macintoshes mid-2012 and earlier used SATA hard drives, so these are broadly compatible with SATA SSDs and hard drives in other machines.

While iMacs continued to use SATA hard drives after 2012, most Macintoshes starting in late 2012 changed to non-standard SSD drives with various proprietary Apple connection formats (which have changed over the years as well) so later Macs require specific SSD drives and specific external enclosures for the model and year.

Mac Pros changed to SSDs with the 2013 Black Cylinder model. Mac Minis came with 2.5 inch SATA hard drives up to the late 2014 model and went all-SSD in 2018.

IMacs 2013 and later have used spinning drives in combination with separate SSD drives (of various Apple proprietary “blade” style formats) in a “Fusion Drive” setup, which appears as a single volume and caches reads and writes on the faster SSD drive. A Fusion Drive set can be broken up and used as separate SSD and Hard drive volumes if you wish. (Note that none of the Apple blade SSDs can be used inside Windows machines because the formats are not compatible.)

If your question was, “Can I copy the data from the iMac SSD to a Windows machine”, then the answer is a little more complex. Windows computers cannot natively read the Apple filing system on the drive, so you would either hook the drive up to another Mac, and copy the data onto a drive or USB memory stick formatted with FAT32 or ExFAT formatting, or you can get some free software (HFSExplorer, Apple HFS drivers) that allows Windows to read the HFS+ system on the Mac drive (if the iMac was at OSX 10.12 or EARLIER)

Another variable is if you had already upgraded the Mac OS to 10.13 or later, in which case the formatting of the drive would have been changed to Apple’s new APFS – so it will not be readable by older Macs pre-10.13. For Windows you will need commercial software (MacDrive, Paragon, or UFS Explorer) to read it. https://www.makeuseof.com/tag/4-ways-read-mac-formatted-drive-windows/

In any of the scenarios above, an external 2.5inch SATA t0 USB enclosure for the SSD drive is a very handy thing to have, Install the SSD in the enclosure and it will allow you to plug the SSD into different machines at will.

USB 2.5 inch drive enclosure kit

If you have a 2013 or later Mac, with most models you can take the proprietary Macintosh SSD out and put in an appropriate OWC Envoy or Envoy Pro USB enclosure, to access the data (there are a very few Apple SSDs that can’t be used externally). Be careful to choose the correct enclosure for your year and model of Mac, as Apple changed SSD physical formats frequently. Contact CanadaRAM.com for advice.

OWC Envoy Pro USB enclosure

Q&A is a compilation of questions we have answered around the Web

Posted in Computer Questions and Answers, General Computer, Hard Drives and SSD, Q&A | Tagged , , , , , , | Leave a comment

Q. Is it possible to connect a USB thumb drive to an iPad?

A. The iPad doesn’t have a USB port so you may think you can’t use a USB stick but actually you can.

First you get an Apple USB 3.0 Camera Connection Kit for Lightning, which gives you USB 3.0 A type port for all Lightning-port iPads and iPhones. This is available directly from Apple or an Apple dealer

Apple Lightning to USB3 Camera Adapter

The USB stick will plug directly into the USB port on the adapter. There is an additional Lightning port for powering the iPad.

Apple Lightning to USB3 camera adapter, end view
End view with USB A and Lightning ports

If you have IOS 13, it directly supports external storage in IOS
 How to use external storage on iPad and iPhone with iOS 13

If you have an earlier IOS version, selected apps support external storage from within the apps but you don’t have direct access to the external storage from IOS.

If your USB device draws more than the average amout of power from the USB port, and it complains of insufficient device power, then you may need to add a USB hub that has an AC power adapter between the adapter and the USB device.

There are a few USB memory sticks that have a built in Lightning plug as well as a USB Type A plug.

SanDisk iXpand Lightning USB memory stick

Q&A is a compilation of questions we have answered around the Web

Posted in Computer Questions and Answers, iPad, iPhone, iPod, Q&A | Tagged , , , , , , | Leave a comment